SpiritHalloween

Friday

Paper Houses for the Halloween Village

Time for the first houses for our Halloween Village. There aren't that many paper haunted house models available on the internet that have the right look, quite a few kid's stuff, but very few nice looking Halloween Village quality models. We found our models at three sites, the Haunted Houses came from RavensBlight (www.ravensblight.com), Haunted Dimensions (www.haunteddimensions.raykeim.com/), and Paper Replika (http://paper-replika.com/).

This post I pictures of the great haunted houses from RavensBlight. The larger of the two is my personal favorite Haunted House, it has just the right look and feel. The RavensBlight Toy Shop is also a great place to go for lots of other wonderful Halloween items. Ray O'Bannon (the creator of RavensBlight) is an artist with a nice feel for Halloween, plus he has a love of Paper Models, so lots of great stuff on his site. The link above goes directly to his Toy Shop where I found the Haunted Houses (plus other stuff) but you should also look at the rest of his site, well worth your time.


Ray has two Haunted Houses in his collection that we are using this year, one is fairly basic and is a good beginning model for new comers to Paper Modeling, the other one is more advanced and is, as mentioned above, my personal favorite.


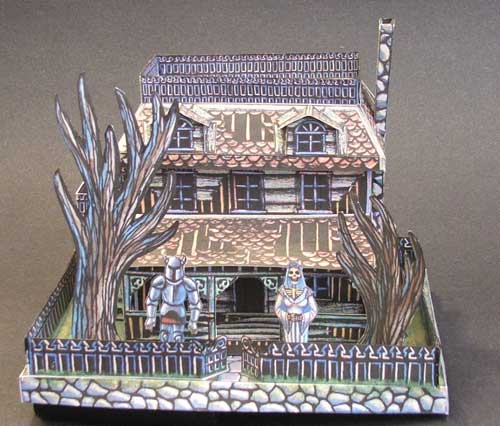
RAVENSBLIGHT MANOR, this is the more basic model


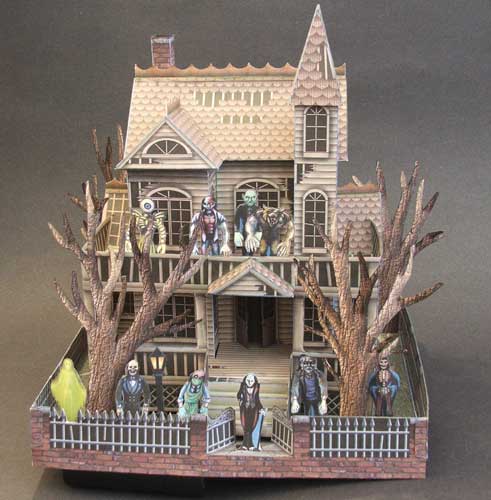
THE GHOST HOUSE - my personal favorite

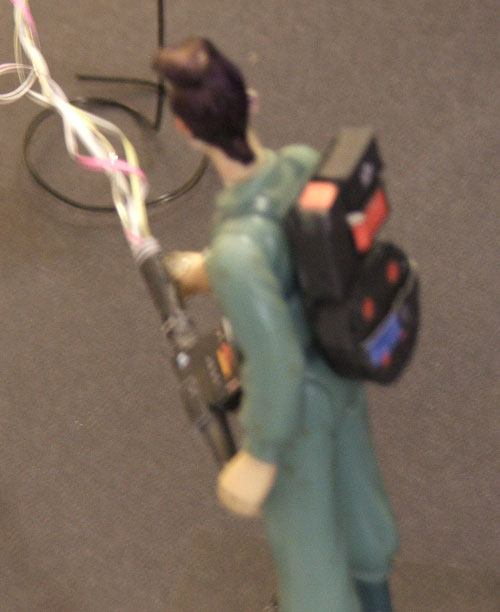
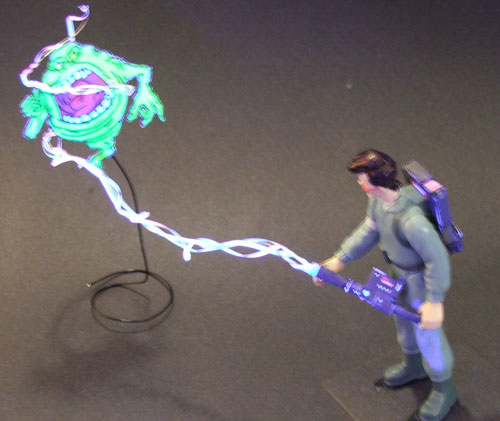
Both of these models are free to download and only require some card stock or thick paper, a printer, and some glue. The monsters standing around in the yards of both houses are separate downloads from the RavensBlight site, Ray calls them MICRO-MONSTERS, they come in two sizes, I used the smaller of the sizes for this display.


Ray's models are very good as is although I always can't help putting in some improvements. On the Ghost House if you will look at the front fence you will see that it has a straight line across the top on the right, that is how the model is designed. I found that with just a little more work you can cut out the top to make it more detailed as seen on the left side fence. The trees were designed to be flat, but it is easy to bend the branches in different directions to give them a very nice 3D look. As always I use color markers to hide any white paper that may show at paper edges and folds. Ray's models really don't need much to finish them off. I thought about making some shutters for the windows but decided against that at the last moment. These will look great in the village with the proper lighting.


One added benefit of using paper models in the village, they glow under black light! Almost all white paper glows a nice blue in black light and that glow shows through the printing on these models since I used an ink jet printer (ink jet ink is transparent). I am not sure if this would work with a laser printer. We are hanging a twin tube fluorescent black light above the display this year to accent the glowing effect.

Tuesday

Casper shows up outside for Halloween

Since we are doing a Ghostbusters theme, and a Ghostbuster made a cameo appearance in the Casper movie, I thought it appropriate that we have a Casper as part of our decorations. Since Casper is a cartoon, having him as a cutout made sense. This was an easy project, here is the finished display (leaning against my door):
Finished Casper

This started out as a blank house for sale sign that I purchased at Lowes Hardware for $6.

Blank Plastic Yard Sign
These yard signs are made out of corrugated plastic, like corrugated cardboard from boxes, but plastic. Size 24 inches by 20 inches, with a metal stand that slides up into the corrugated plastic.

Next I found a picture of Casper by doing a Google search, then scaled that up using InDesign CS4 to the size I needed. I chose InDesign because it has a nice tiling feature letting you print a large picture on several smaller sized pieces of paper (like this large blowup printed onto letter sized paper).


Original image, partially done enlargement

Here is the blowup from InDesign, took 8 sheets of paper
I traced the blowup onto the plastic sign and then outlined the lines using a Sharpie marker. I outlined them because they needed to go thick to thin to look like cartoon ink work. Most of the lines were thin near the ends and thick in the middle. After the outline I simply filled in between the lines with the Sharpie.

You can see the traced pencil lines around the face, the outlines around the body, and the beginning of the filled in lines on the head.


Outlining finished, working on filling in

Once the marker work was done I marked around the image using a compass and pencil to give me a guide to cut out the image. I decided to leave a 1/4 inch around the figure so that it retained the cartoon look. Then I cut out the image using an exacto blade. Total time about 2 hours for the project.

Marking guide lines around the image


One more time, the finished cutout image, about 2 feet across, attached to metal stand.

Once we get our outside display up, 1 week before Halloween, I will put up a picture of Casper in his "Final Resting Place".

Sunday

Halloween Village gets a Ghostbuster

It wouldn't be a Ghostbusters theme in our Halloween Village without a Ghostbuster, so that came next. I found one for $1 at a thrift shop. It was an action toy of Egon from the Real Ghostbusters cartoon show. Our plan was to follow the movies so I had to recolor his hair to black, since they changed it to blond for the cartoon. Some quick work with a Sharpie and all fixed.

Egon was glued to a piece of black card stock so that he would not fall over. Next he needed a backpack and a gun since those were missing in the action figure I bought. A quick look around the internet and I found something that would work. Back to the PaperInside paper modeling blog where they had a not too great full size backpack and gun that would be OK for a Halloween outfit (with some more work and customizing), but scaled down and printed at thumbnail size it was perfect for my model.


See the paper model here: Ghostbusters backpack, this is the same page as the great Ectomobile model below.

Next I added in a picture of Slimer from a Google search, printed onto card stock and glued to a wire stand. For the plasma rays I used thin strips of paper wound around a thin wire. The strips were colored different colors with highlighting markers so that they would glow under black light. I also used a yellow highlighting marker on Slimer to let him glow as well.

When this is placed into the Halloween Village it will look great.

Saturday

Ghostbusters paper models for Halloween Village

Since this Halloween we planned a Ghostbusters theme for our Halloween Village the first thing we needed were some Ghostbusters stuff. I did a search on the internet for Ghostbusers paper models and came up with 3 great paper models that will work for our village. First was a nice Stay Puff Marshmallow Man, fairly straight forward and fun model, lots of rounded shapes which added to the interesting aspects of building this model.

This model went fairly fast. You can find it here: Stay-Puft-Marshmallow-Man

Next came one of the most difficult and time consuming models of the whole display, the Ectomobile. Great model, lots of small parts and interesting details, including using some clear acetate for the windows and some work with wire for antennae, hoses and such. I also used some chrome cardstock for the chrome parts. The model only had pictures instead of directions, but not that difficult to follow.


This took a while, but worth it. You can find the model here: ecto-1 Paper Model. This model really deserved more time than I could put into it, but good enough for our display.

The final Ghostbusters themed model I decided to use was the Statue of Liberty, available at Canon Creative Park. Quick, easy build.

You can find this model here: Canon Creative Park - Statue of Liberty

There are several other Ghostbusters themed paper models on the web, but none of them had the look or feel I wanted for our Halloween Village, so they didn't make it into this display. For an actual Ghostbuster I am using an action toy, more later.